

UI の設計
描画モード
Web アプリケーションの UI を設計をする際に知っておかないといけないのは、ブラウザには何種類かの描画モードがあるということです。この描画モードを意識しないとブラウザによって見え方がバラバラになってしまいます。
パネルと Widget
Widget (ウィジェット) はボタンやテキストボックスなどを表す UI コンポーネントです。
パネルは Widget のコンテナになります。パネルを用いて、Widget をレイアウトします。
パネル
パネルには以下のような種類があります。
| パネル名 | 内容 |
|---|---|
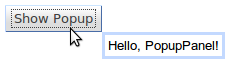
| PopupPanel | ポップアップパネル
|
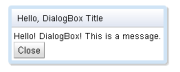
| DialogBox | ダイアログボックス
|
| StackLayoutPanel | スタックパネル |
| StackPanel (互換モードのみ) | |
| HorizontalPanel | ホリゾンタル・パネル |
| VerticalPanel | バーティカル・パネル |
| FlowPanel | フロー・パネル 最も単純なパネルで HTML で言えば div 要素にあたります。 |
| VerticalSplitPanel | バーティカル・スプリット・パネル |
| HorizontalSplitPanel | ホリゾンタル・スプリット・パネル |
| SplitLayoutPanel | スプリットレイアウトパネル |
| DockLayoutPanel | ドックパネル |
| DockPanel (互換モードのみ) | |
| TabLayoutPanel | タブパネル |
| TabPanel (互換モードのみ) | |
| DisclosurePanel | ディスクロージャ・パネル |
RootPanel と HTML 要素
標準モードで利用できるレイアウトパネルを利用するには、ルートのパネルとして ルートレイアウトパネル (RootLayoutPanel) を利用します。
- パネルの利用例(1) - FlowPanel, HTMLPanel, PopupPanel
- GWT の UI デザイン - 動くサンプルです。Google App Engine をカスタムドメインで利用しています
Widget の種類
GWT では複数の Widget が定義されており、これらを組み合わせることによって、 様々な種類のアプリケーション UI を実装することが可能になります。
| Widget 名 | 内容 |
|---|---|
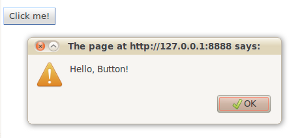
| Button | ボタン
|
| PushButton | プッシュボタン。押した状態で無効化等の効果がある |
| RadioButton | ラジオボタン |
| CheckBox | チェックボックス |
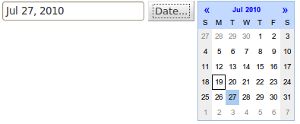
| DatePicker | デートピッカー。カレンダーの表示
|
| ToggleButton |
トグルボタン。アップ、ダウン、無効
|
| TextBox | テキストボックス |
| PasswordTextBox | パスワードテキストボックス |
| TextArea | テキストエリア |
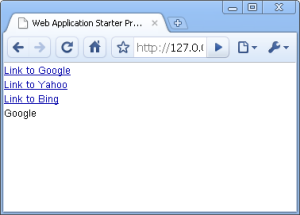
| Hyperlink | ハイパーリンク
|
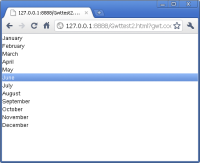
| ListBox | リストボックス |
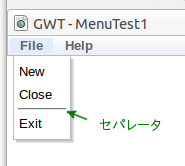
| MenuBar | メニューバー
|
| Tree | ツリー |
| SuggestBox | サジェストボックス。オートコンプリート |
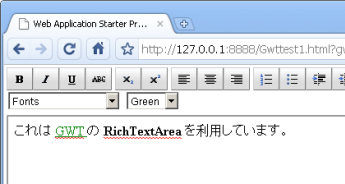
| RichTextArea | リッチテキストエリア. 書式付テキスト入力
|
| Table | テーブル |
| TabBar | タブ・バー |


GWT 2.1 以降の Cell 系ウィジェットのサポート
| タイプ | 内容 |
|---|---|
| CellList | セルリスト
|
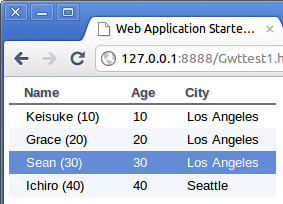
| CellTable (セルテーブル) の 利用サンプル | セルテーブル
|
| カスタムセルの利用 | TextCell などの標準のセルではなく、カスタムのセルクラスを定義して、セルリストなどで利用する方法を示します。 |
GWT 2.0 の UiBinder サポート
GWT 2.0 から UiBinder がサポートされました。これは XML で UI Widget を定義する方法です。
こちらを利用する具体的な方法は以下のページを参照してください。
レイアウト例
それでは具体的に、次のようなレイアウトを行うためのコードをみてみましょう。

このような配置を行うために、まず全体を縦に3列のレイアウトと考えます。 縦の列を作るためのコンテナは VerticalPanel です。
1列目に Label "Name" と TextBox が横並びでレイアウトされています。 横並びのレイアウトは HorizontalPanel とします。 HorizontalPanel に左から右に、Label、TextBox を順番に追加し、 その Label と TextBox を含む HorizontalPanel を、VerticalPanel に追加します。
2列目も同様です。Label "Email" と TextBox を含む HorizontalPanel を作り、 それを VerticalPanel に追加します。
3列目は Button を直接、VerticalPanel に追加しています。
最後に出来上がった VerticalPanel を RootPanel を用いてホストページに接続しています。
コード例は次のとおりです。
package com.keicode.gwt.test.mytest.client;

import com.google.gwt.core.client.EntryPoint;
import com.google.gwt.user.client.ui.Button;
import com.google.gwt.user.client.ui.Label;
import com.google.gwt.user.client.ui.RootPanel;
import com.google.gwt.user.client.ui.TextBox;
import com.google.gwt.user.client.ui.VerticalPanel;
import com.google.gwt.user.client.ui.HorizontalPanel;

/**
  * Entry point classes define <code>onModuleLoad()</code>.
  */
public class MyTest implements EntryPoint {

     private VerticalPanel mainPanel = new VerticalPanel();
     private TextBox nameTextBox = new TextBox();
     private TextBox emailTextBox = new TextBox();
     private Button addButton = new Button("Add");
     private HorizontalPanel namePanel = new HorizontalPanel();
     private HorizontalPanel emailPanel = new HorizontalPanel();
     private Label nameLabel = new Label("Name:");
     private Label emailLabel = new Label("Email:");

     public void onModuleLoad() {

          namePanel.add(nameLabel);
          namePanel.add(nameTextBox);

          emailPanel.add(emailLabel);
          emailPanel.add(emailTextBox);

          mainPanel.add(namePanel);
          mainPanel.add(emailPanel);
          mainPanel.add(addButton);

          RootPanel.get("contactList").add(mainPanel);

     }
}
コンテナには add で、Widget や Panel のインスタンスを追加します。 RootPanel には get で、ホストページ (HTML ページ) 内の div 要素の ID を指定してそれを取得して、 その中にコンテナを add しています。